You can easily add products to your product list in Manage. Follow these steps to create a new product:
From Product List, click + Create Product – This opens the product editor.
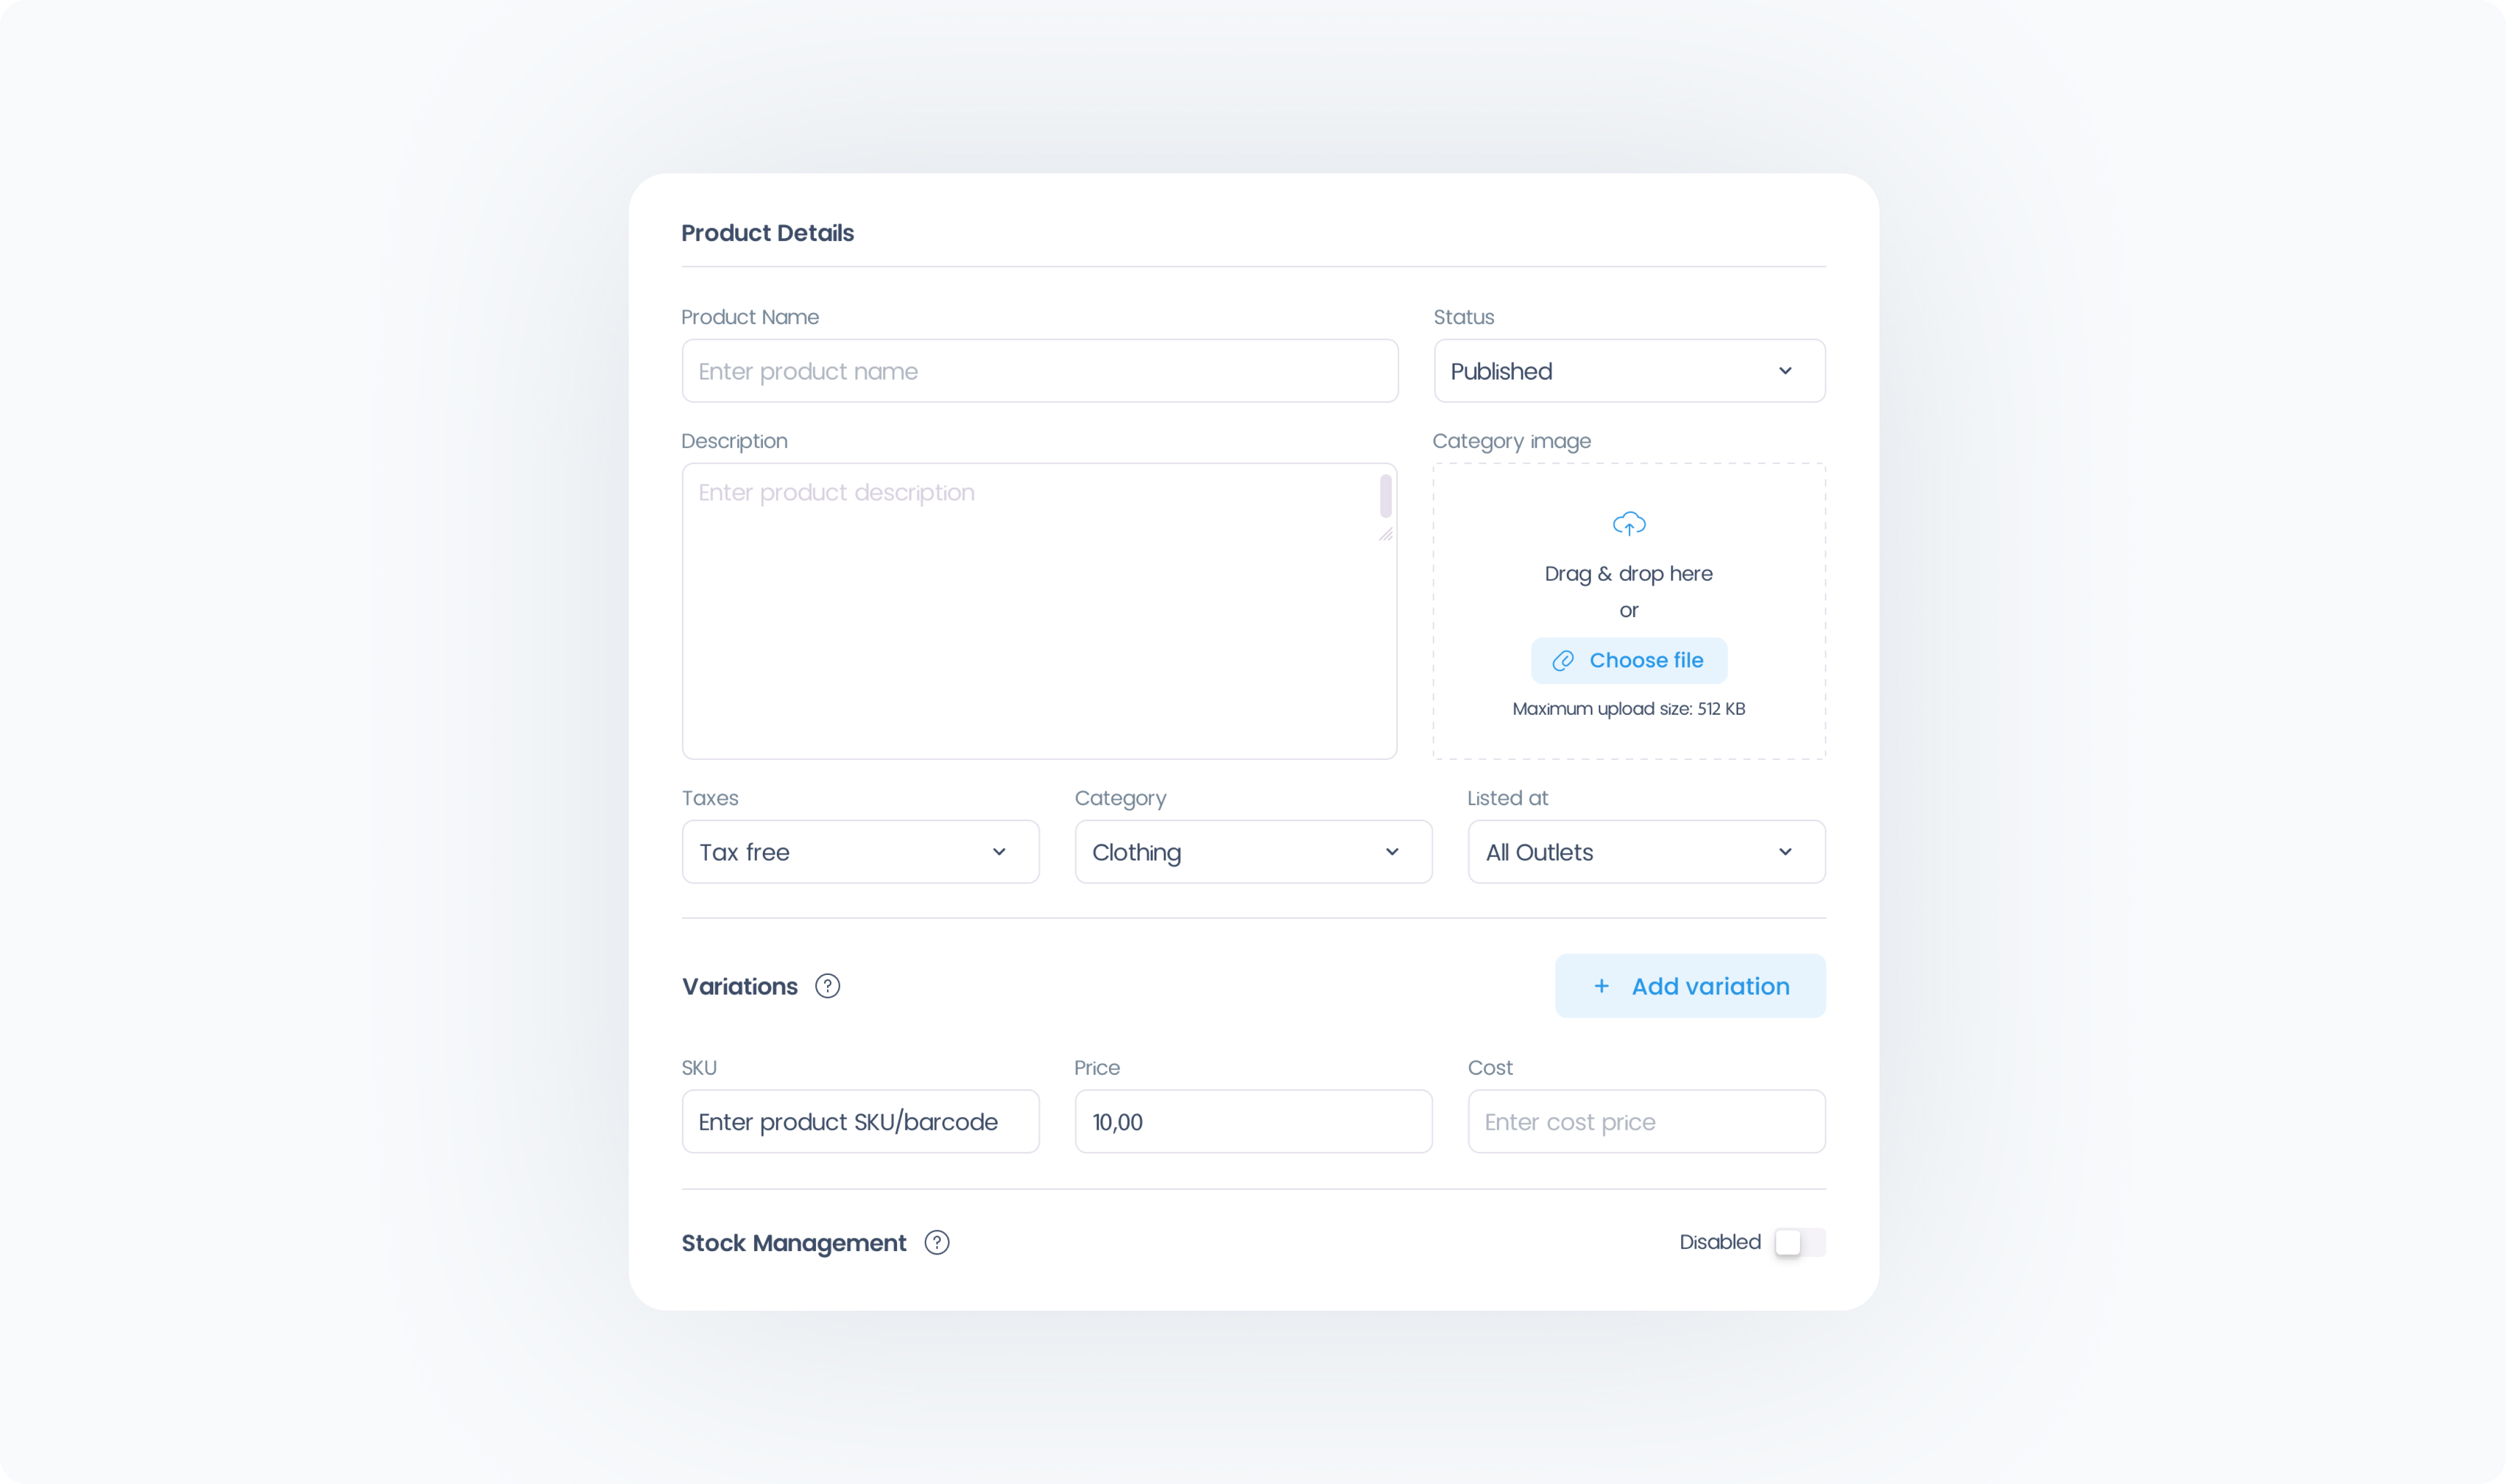
Enter a name and price for the product – All other fields are optional.
Configure product settings –
Choose a Tax Class
Select the appropriate Tax Class for this product. (For example: "Standard Tax.") Each Tax Class is linked to a specific table of tax rates that are applied based on your Outlet’s address.
Assign categories and Outlets
If you’ve already created categories, you can tag this product accordingly. You can also choose which Outlets carry this product.
Enter a SKU and price
The SKU is optional, but recommended for inventory tracking. Add the price that will appear in the POS.
Click Save
You’ll see a confirmation once the product is created successfully.
That’s it! Your product is now active and ready to sell.